Joust repair log

finished Joust restoration

From 2017 to early 2020, I was repairing a Joust cabinet that we had acquired from a rural area. The person who sold it to us claimed that it had been in a hotel lobby for years. They also claimed that it had been “working like a champ” up until we came to see it. Regardless, it was a good price even if it was not running, so we gladly picked it up.
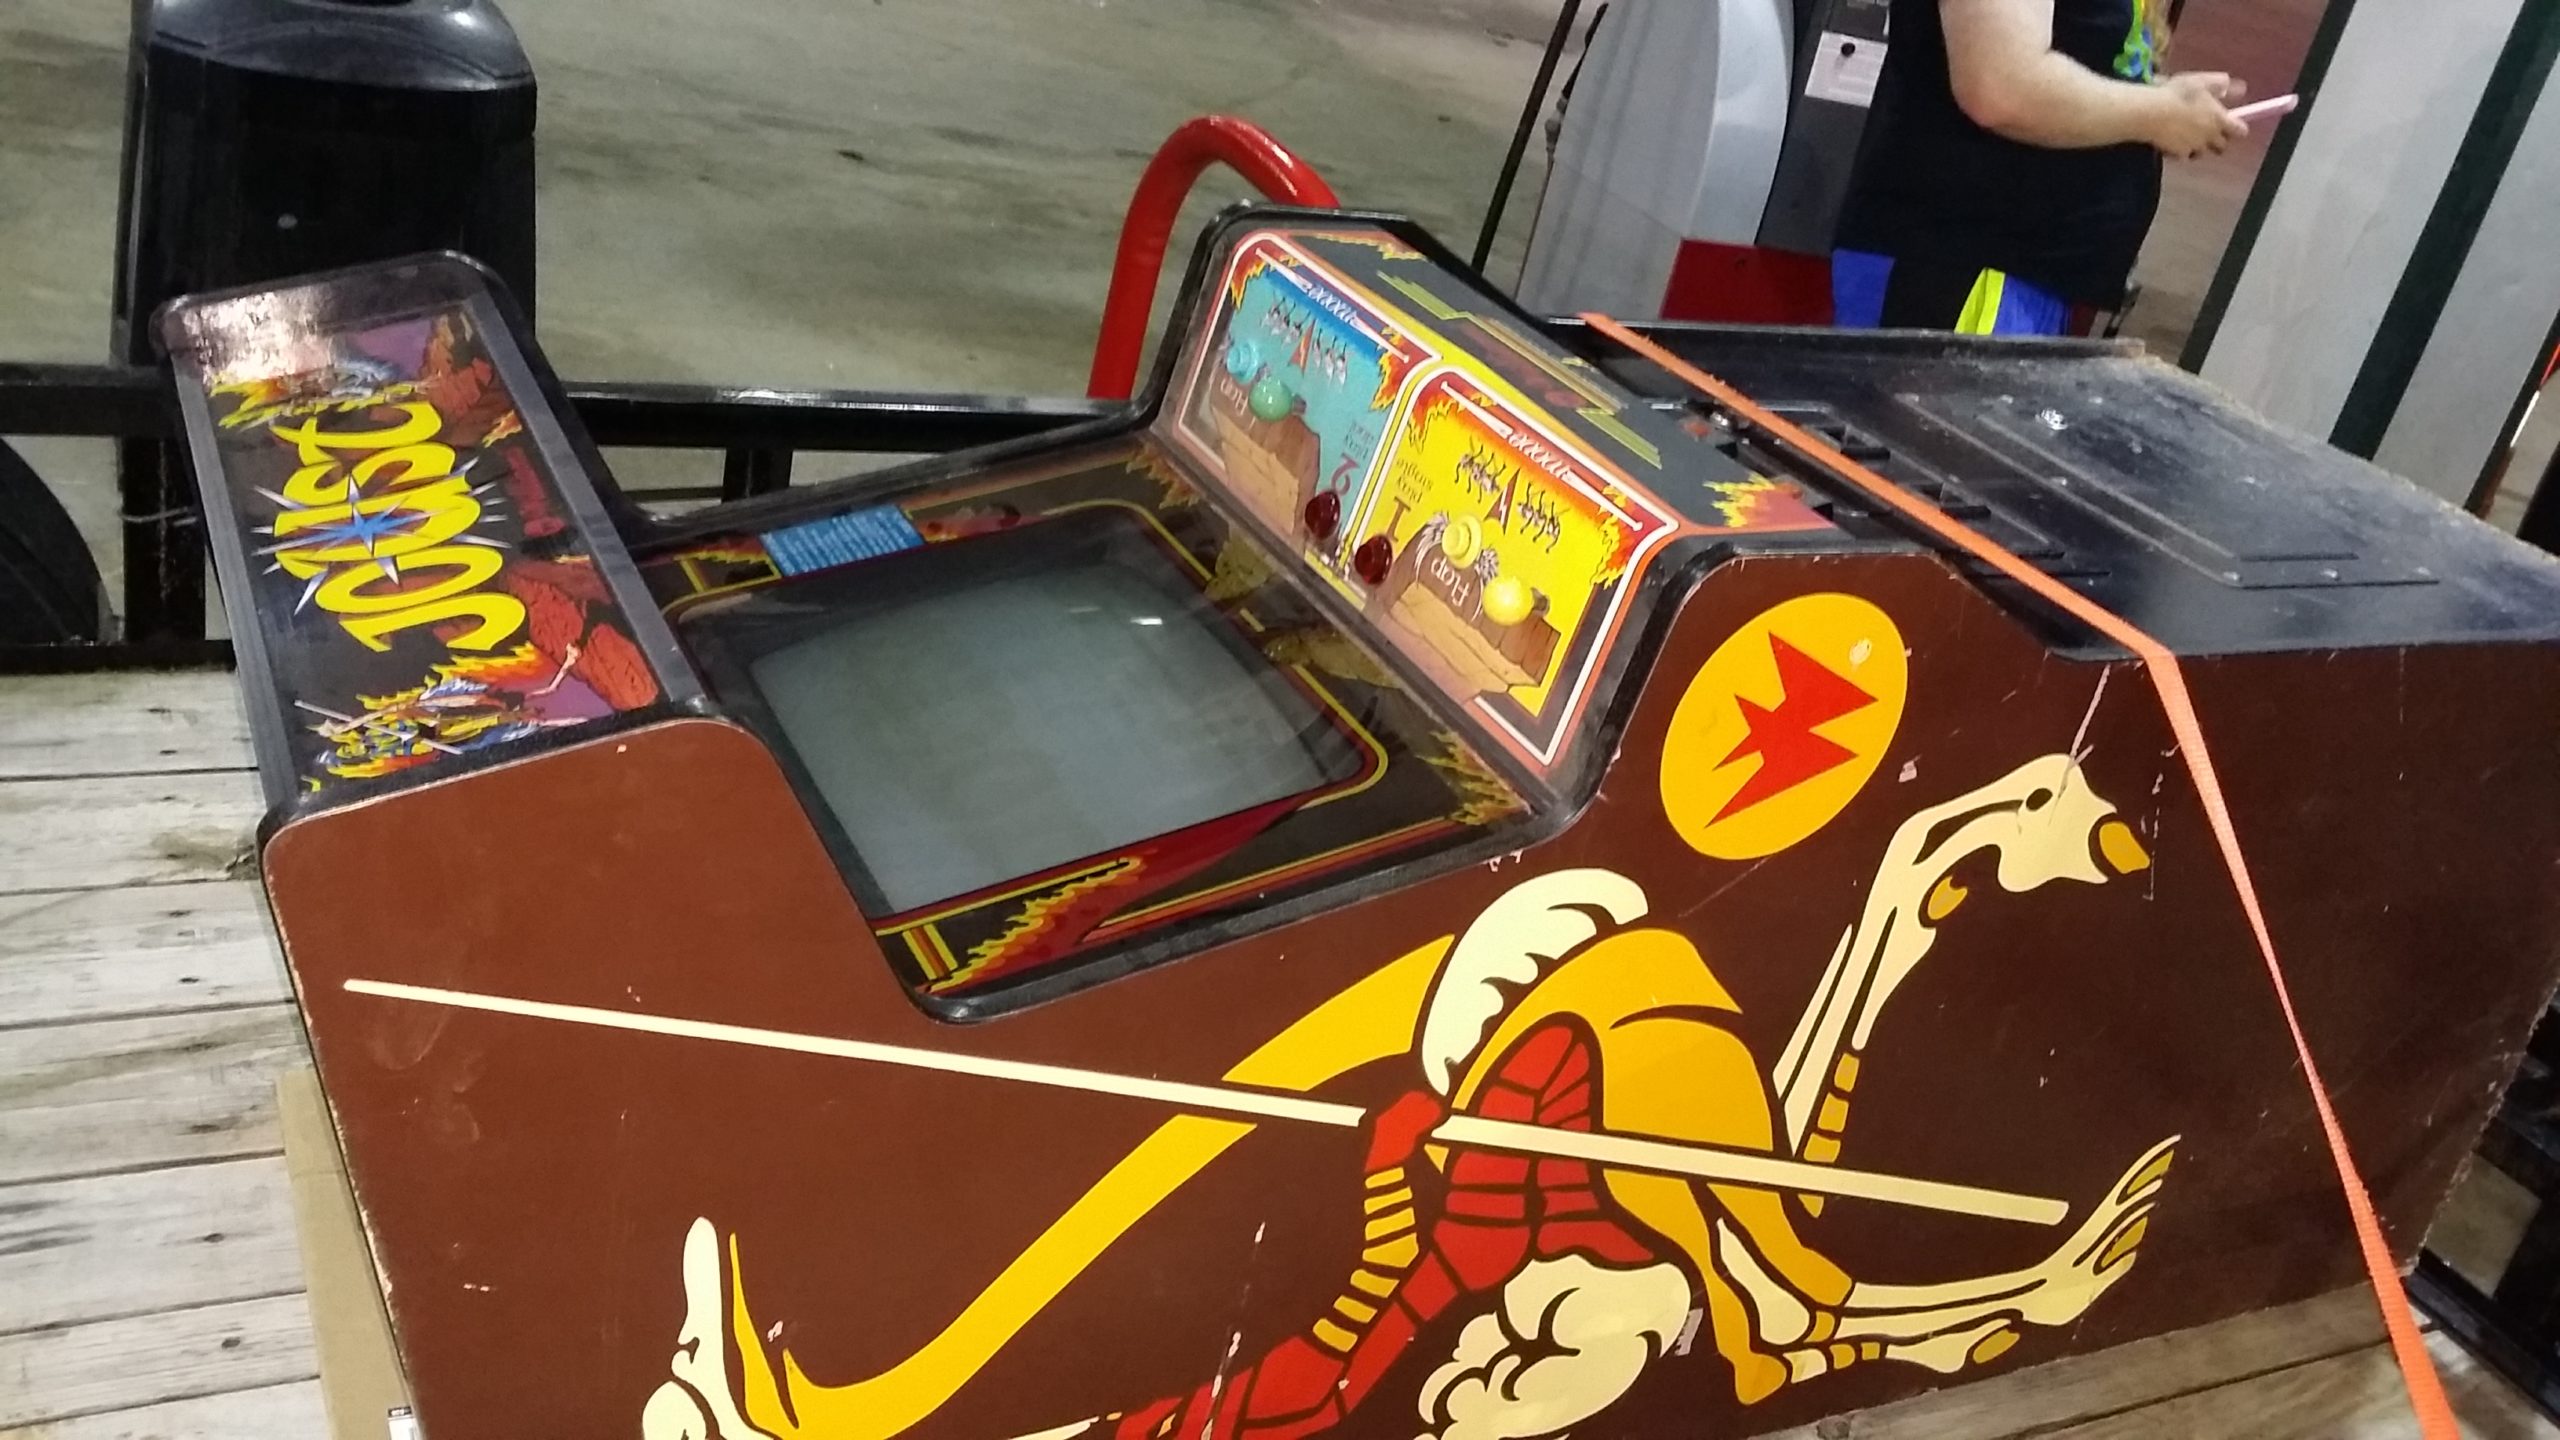
Joust cabinet strapped to a trailer bed

When I got it home, I began to understand the severity of the project I was about to undertake. The back door (the portion behind the monitor) was missing and someone had removed the safety interlock switch, choosing to wire the connections together to defeat the mechanism. A very odd decision, since the interlock switch has a bypass position anyway (just pull the switch outward and it locks in the “on” position.)
interior of cabinet showing hacked wiring

More confusingly, large traces for the bridge rectifier had been removed from the power supply board and replaced with heavy gauge wiring on the opposite side of the board. The power still flows as intended, but it’s very strange. I can only assume that it overheated and damaged the traces to such an extent that the person involved in this “repair” deemed it the only way forward.
damaged traces on power supply boardthick wires soldered to underside of power supply board
The connectors from the transformer had also been very badly redone at some point and needed to be replaced as soon as possible. Some of the original connectors were still present but had been burnt due to their poor design. The original connectors all have round pins, which provide very little surface area to contact with their connectors. This causes the connector to heat up because it’s forcing so much electricity through such a small space. Heating causes oxidation of the metal, which causes resistance, which causes more heat since it’s now even harder to get the electricity where it’s supposed to go, and soon you end up with blackened connectors like this.
connector on power board with burnt pinspoorly done wiring connector

The other circuit boards were not faring much better. The flip-flop chip on the ROM board had been physically broken and some of the ROMs had their labels scraped back.
Joust ROM board with broken flip-flop chip

While I waited for a new flip-flop and other parts to arrive, my dad helped me cut out new back doors for this Joust and for another Joust cabinet that had been turned into a single-slot Neo Geo machine. I painted them and got new locks so they would be ready to install.
two back doors for Joust cabinetsJoust back door with lockback of Joust cabinet with door installed

When the parts showed up, I started by reworking the power supply board first. Gone are the makeshift parts and bulging capacitors, now replaced with fresh, quality parts. All of the pin connectors have been replaced with new square pins that provide much more surface area to conduct with, so they will last a much longer time than the old round ones.
Joust power board with bridge rectifier removedpower supply board with bulging capacitorsfreshly reworked power supply board

The replacement flip-flop for the ROM board showed up in this extremely large box, which I found amusing.
cardboard boxflip-flop chip in antistatic bag

I replaced the broken flip-flop and installed the repaired boards into the machine.
broken chip on ROM boardROM board with chip replaced

I tried booting the machine, and lo and behold, it worked!
Joust machine booting

I got to work cleaning the cabinet up, starting with the monitor glass. I found the original amusement license taped to the back.
back of monitor glassamusement license taped to back of glassamusement license expiring in 1984Joust monitor glass

In order to get the settings and high scores to save, I had to replace the old corroded AA battery holder with a new CR2032 battery holder and perform a small wiring hack to get it to power the SRAM. I also had to clean up some corrosion from the AA battery leakage that had occurred in ages past.
AA battery holder on main boardmain board with battery holder removedwatch battery holder installed on main board

I needed a new fluorescent tube for the marquee, and I discovered that while I had the marquee plex removed, a house lizard had found its way in. Better keep that covered.
lizard inside marquee cavity

One annoying thing that kept happening during my repairs was a persistent “RAM Error 21” that wouldn’t go away no matter what I tried. I replaced the RAM chip in the reported location and replaced its socket, but to no avail.
RAM chip removed on main board

Another persistent problem with this game was its monitor. At first, I wasn’t sure what was causing this problem, but after a while I realized that it needed new capacitors. What I was seeing was the top line of the display (which should ideally be offscreen, since it’s actually game data and not graphics) was folding over, overlapping onto the part of the screen that’s supposed to be visible. Foldover happens sometimes when capacitors in the monitor are old and out of spec, causing the electron beam to be projected incorrectly.
Joust screen with bad graphics at the top
One cool thing about Williams games of this era is that they have a little metal mirror you can use to adjust the monitor. The monitor slides back out of the cabinet and you can then use this to see while performing your calibration.
adjusting Joust monitor in mirrorJoust monitor in adjustment position

There’s also an abandoned wasp nest under this monitor. Where were they keeping this thing?
wasp nest under monitor

The replacement safety interlock came in, so I replaced it as well. Now it functions as it should.
safety interlock switch

When moving this cabinet around, I could hear coins rattling around. I didn’t have the coin door key so I unscrewed all of the bolts from the inside and found about $20 in cash. Not a bad rebate!
coin doorcoins in bucket

I also got some very nice directional LEDs from a pinball lighting supply to really bring out the start buttons.
two LED lightsglowing start buttons

Now for the big problem with this game. The RAM error I mentioned earlier had never gone away, and whatever was causing it was also causing random crashes and glitches while playing. Lots of pieces of player and enemy graphics were being left on screen while the rest of the graphics moved; sometimes strange outlines would be left on screen or the platform graphics would start to erode from enemy graphics being mistakenly superimposed there and then moved away but not refreshed.
Joust screen with graphical glitchJoust screen with graphical glitchJoust screen with graphical glitchJoust screen with graphical glitchgame screen with error

It also caused some fairly amusing errors when the settings failed to be saved when the game crashed.
joust bookkeeping totals screen but all numbers are 666666joust game adjustments screen with glitches

Since there wasn’t anything wrong with the RAM chips themselves, I knew the problem had to be somewhere else in the machine. Through a tedious process of elimination, I determined that something was wrong with the ROM board. I also have a Robotron machine to test with, and it has the same hardware as Joust. I tried moving the Joust ROMs onto the Robotron ROM board and ran it in the Joust machine, and there were no errors. (Oddly, the Joust ROM board worked fine in Robotron as well, but there must be something wrong that just doesn’t affect the Robotron game program.)

I eventually tried replacing nearly every chip and component on the ROM board that could have had an effect on this problem, with no luck. No matter what, the errors remained. I even heard the processor on the sound board might be responsible, so I socketed it and tried replacing it as well.
chips on ROM boardROM board with chip removed

Finally, I decided to cut my losses and found a replacement ROM board on eBay. This one needs its 40-pin ribbon cable connector replaced but has so far given me no problems at all. The game now works fully!
holding replacement ROM board in front of old ROM boardROM board and new ribbon cable connectornew ROM board with new pin connectorsscreen reading "all systems go"

With that finally out of the way, I finally took the time to recap the monitor. The model in this Joust is a Wells-Gardner 19K4901. This was a little tricky because in order to disassemble it, you have to disconnect this black ground wire from the chassis, and it’s soldered to a spring on the tube. The best thing to do is just cut it and then crimp a quick disconnect to it when you’re ready to install it back in the frame.
Joust monitor chassisJoust monitor chassis sitting on tablebottom of Joust monitor circuit boardJoust monitor board reinstalled

The game was now in fully working condition.
During all of this at some point I had also cleaned the control panel with Armor-All to remove all of the tobacco tar that was built up on it. I didn’t feel like replacing the entire CPO since most of the area with art still looked fine. I took some black duct tape and overlaid it on the black areas with the worst ash burns.

The last thing to do was to repair the terribly damaged bottom section of the cabinet. For some unknown reason, this cab, like many others, had at some point had its feet removed. This left it sitting on exposed plywood, since any runners that may have been stapled to the bottom were also long gone.
To start out, I cleaned the wood off as much as possible, and tried to use some wood hardener to stiffen what was left. That didn’t work as well as I wanted, but it was enough to go ahead and start filling in the gaps with some Plastic Wood. I like this stuff a lot. It’s easy to work with and can be used to rebuild wood in layers. Just add some, sand it flat, and add more to build up the missing parts of the wood.
repaired section of woodrepaired section of woodrepaired section of wood

I also had to clamp the wood while it was hardening in order to make it straight again. Years of sitting had made it start to curl inward. The front MDF panel was swollen from contact with water on the floor at some point as well so I added more wood hardener to it and clamped it down.
clamps on woodbottom of Joust cabinet

I filled in whatever other gaps I needed to and prepared to mask it off for painting.
damaged section of woodrepaired section of wood
repaired section of woodrepaired section of wood

I found paint codes for Joust that were very close to the original, and had Lowe’s make up some brown paint which I then rolled on after masking the original art. I did some small touch-ups after that. It isn’t like new, but it doesn’t need to be.
Right side:
joust side art with partially masked stencilfully masked and partially painted sideright side finished product

Left side:
left side art partially maskedleft side art fully painted

Back:
back of cabinet before paintingback of cabinet after painting

After that, I had some 3/4″ metal channeling I had cut to shape and painted black, to imitate the original plastic runners that had been stapled to the bottom.
metal channeling painted black

I hammered them in place with a mallet.
bottom of cabinet sidebottom of cabinet with no feetbottom of cabinet with metal channeling in place

Finally, I added teflon leg levelers so it would be easy to slide around on the floor.
bottom of cabinet with feet

After that, it was time to set it upright and enjoy!
finished Joust restoration

2 thoughts on “Joust repair log”

  1. Nice work! Can you share the brown paint code? I assume you used acrylic paint to touch up the other colours?

    Also what sized leg levellers did you use and where did you grab them?

    Thanks

    1. Thanks!

      I got the paint codes from the now-defunct gamestencils.com. They are Valspar codes so they may only be useful in the US.

      Valspar Ultra prem Interior Semi-Gloss 101-1Y27.5 / 109-28.5 / 113-0.5 / 115-39.5
      Quart, Base 4

      https://web.archive.org/web/20180629055930/http://www.gamestencils.com:80/paint-codes

      The red and yellow paint was so minimally damaged that I didn’t feel the need to touch it up. Almost everything was taken care of by the brown.

      I got the leg levelers from https://quarterarcade.com/teflon-leg-leveler-8166 but they seem to be differently formulated now, because I ordered another batch recently and the new ones have a lot more friction so your results may vary. I also got their mounting plates at https://quarterarcade.com/leg-leveler-mounting-plate and screwed them in with some large screws I got at Lowe’s.

      I hope this helps!

Leave a Reply

Your email address will not be published. Required fields are marked *